Lander Lab #3: Buoyancy
There is a palatable excitement when an ocean lander is released to explore the deep sea. The checklists and endless tests all come down to this moment. Our optimism is high because none of this is new. Still, we realize the risks. Davy Jones is a crafty soul, and tries to keep what he covets. Looking down, the lander dissolves into flickering scraps of color that fade to blue. And it’s gone. One imagines the dry and safe environment inside the top command sphere. The clocks are running. As the lander descends towards the seafloor, the ocean outside shifts to darker hues of violet, then black.
A safe return relies on Archimedes’ principal of buoyant force: any object immersed in a fluid is buoyed up by a force equal to the weight of the fluid displaced. If our vehicle is heavier than an equal volume of seawater, it sinks. If it’s lighter, it floats. That’s how we go down and back up again. A descent weight makes the lander negatively buoyant and it sinks. Releasing the weight makes the lander positively buoyant and it floats.
The weight of the displaced fluid may vary with salinity, temperature, and depth. Surprisingly, a vehicle can actually gain buoyancy as it travels deeper.
We strive to make the vehicle strong enough to work, but light enough in air to be managed by a small crew on deck. It’s elegance of design.
We have a strict buoyancy budget to work with, and strategies to stay within that.
Buoyancy Budget refers to the amount of flotation available to lift the lander with payload. Subtract half the buoyancy of the upper sphere as that portion will be above water on recovery. The remainder is the flotation available for everything else.
There are three buoyancy states of materials and components: positive, negative, and neutral. We can combine these to solve both the flotation and stability problems.
Specific gravity: One of the first techniques to stay within the buoyancy budget is the use of a material selected for its specific gravity, strength and bulk modulus. All things being equal, select the lighter material. For example: Fiberglass (FRP) has a specific gravity of 1.7, whereas aluminum is 2.7. Steel is about 8. Lead is 11.3. Marine grade HDPE is 0.96, which means it floats. We don’t use HDPE for flotation, but it subtracts zero from the buoyancy budget. Most plastics are not prone to corrosion, though some are hygroscopic and absorb some percentage of water over time. A great reference is Steven Dexter’s text, “Handbook of Oceanographic Engineering Materials”. An earlier copy is available for free through WHOI.
Design tip: Subtract the air weight from the buoyancy budget of an item placed inside a sealed pressure case. Subtract the water weight of an object placed on the frame and exposed to the sea.
Sizing flotation: It is possible to have too much positive buoyancy. That requires a much larger anchor, and a heavier frame to hold all of that. As a vehicle gets larger, it gets more expensive and unwieldy. You can sense when the design spiral is turning in the wrong direction.
A lander should have means to add positive and negative buoyancy. Like a spar buoy, the part of the lander above the water line after ascent should be no more than 20% of the overall length. I trim the vehicle for just half of the top sphere to be out-of-water.
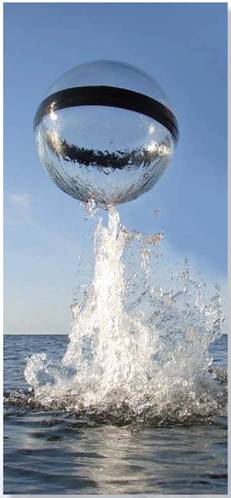
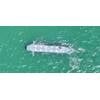
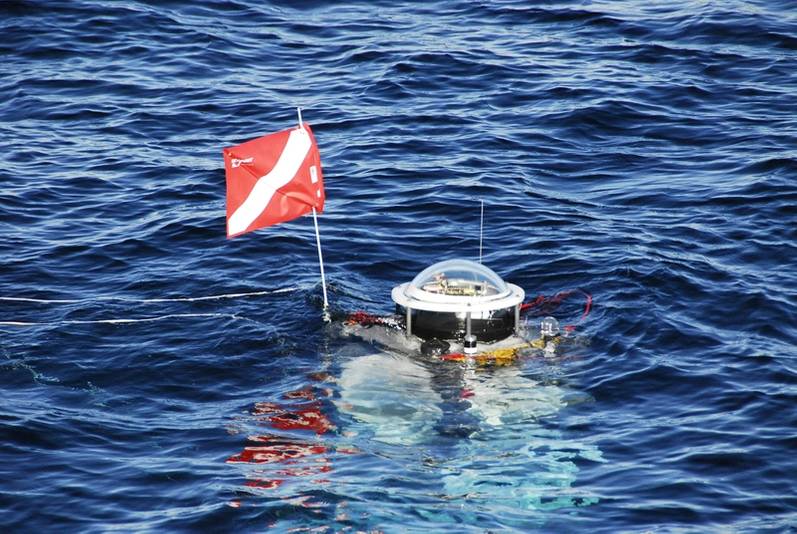 Figure 2. A Global Ocean Design Alpha Lander floats with its upper sphere half out of water. The remainder of the 8-ft lander resides safely below water. (Photo by Kevin Hardy)
Stability: A simple design rule: Flotation high, weight low. This provides the vehicle its stability on descent, on the bottom, on ascent, and at the surface. Recall that when the lander returns to the surface, we want to have ½ of the upper sphere out of the water. This is so our satellite beacons can see the sky, the strobe is clearly visible, and our flag stands proudly above the vehicle on the surface. The portion of the lander out of water is now negative weight lifted by the vehicle from below. Too much of the lander lifted from the water may turn the lander into a log, floating horizontally.
Stability of a lander is easier to establish than a glider or AUV as the separation of the center of flotation and the center of gravity can be a significant distance. The lander can be tall and slender, like a spar buoy, with minimal frontal projected area in the direction of travel that causes drag. The long vertical length enhances the intrinsic stability of the lander in all modes of operation.
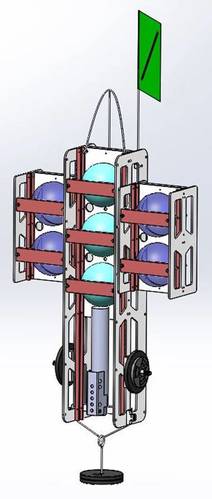
Auxiliary buoyancy: These are side flotation pods added to increase net positive buoyancy for heavy payloads. These are added in equal measure to both sides to maintain uniform trim. In our landers, we place the top of the side pods below the centerline of the top sphere. This aids in lifting the upper hemisphere out of the water for recovery. We have to add flotation in minimum increments of the spheres we have. If that adds too much flotation, and the lander is sitting too high in the water, we add additional counterweight to the bottom, also in equal measure to each side.
Auxiliary side pods also provide space for additional batteries for lights, or instrumentation from research colleagues hitching a ride on your lander. Placing the pods on the sides also reduces the height under the A-frame, if that’s a consideration.
• Trim: An axis of symmetry runs through the centerline of the lander, top-to-bottom. The centerline points the way to the seafloor and surface. Distribute positive and negative buoyancy uniformly around this axis. Position trim weights to balance as needed. A 2-lb transducer on one side, gets a 2-lb trim weight on the other side. Too much weight on one side will tip the lander and force a glide angle away from the drop point, both down and back, in some undetermined compass direction. We’ll discuss recovery beacons in another issue.
• Water float test: Begin where you want to end: the descent anchor gone, and the lander floating upright and stable on the surface, flag high, and the upper sphere half out of the water. A dunk test off the stern of the boat before you leave the dock is a better place to find a problem than on-station with everyone on deck and the weather window closing.
• A design tip: Keep the upper hemisphere of the top sphere as empty as possible. Restrict contents to recovery beacons that need to see or be seen. This limits the amount of weight that needs to be lifted above the water line on recovery. If heavier elements are required, such as an acoustic release system, place those parts in the lower part of the top sphere. An acoustic release board or countdown timer release with their batteries could also be in a sphere further down the stack, with just the transducer placed in an unobstructed position to see upwards. It could also occupy one of the spheres in one of the Auxiliary Side Pods.
• Sizing the descent weight: Fixed counterweights, lead or steel, are added to position the upper half of the top sphere out of the water. The water weight of the descent weight, most often a stack of iron barbell weights, is approximately equal to the positive buoyancy of the full upper sphere.
Water weight of a solid material is calculated as:
Water weight = Material weight x ((Material Specific Gravity-1.03)/(Material Specific Gravity).
If iron has a specific gravity of 7.9, and seawater is 1.03, a 10-lb iron anchor in air will weigh 8.7-lbs underwater.
Alternately, to calculate the air weight of an iron anchor of a desired water weight:
Desired iron anchor air weight = Desired iron anchor water weight x (7.9/(7.9-1.03)), or approximately:
Desired iron anchor air weight = Desired iron anchor water weight x 8/7
Thus, if a desired iron anchor water weight is 10-lbs:
10-lbs (water weight) = 10-lbs x (8/7) = 11.4-lbs air weights
This provides the same force pulling the lander to the seafloor as it will have coming back up. A first approximation: a 10” sphere is 9-lbs positive, so a minimum 11.5-lb air weight iron descent weight should be enough if half of the top 10” sphere is above water. A thirteen-inch sphere is 24-lbs positive. A minimum 28.5-lb air weight iron descent weight should be enough if half of the top 13” sphere is out of the water. A 17-inch sphere is 57-lbs positive. A 65-lb air weight iron descent weight should be sufficient if half of the top 17” sphere is out of the water. If bottom currents are suspected, an additional 20% weight could be added to keep the lander from hopping across the seafloor.
We discussed ferrocement anchors in the January 2022 MTR, cheap and heavy, using steel stampings for the coarse gravel in a concrete mix. You’ll need to do the air weight/water weight measurement yourself to determine what specific gravity you’re getting. Because it’s a composite of cement and iron, you’ll likely hit around 5, about twice as dense as straight concrete.
Air weight/water weight three-ring binder: to facilitate flexibility of operations and future mission planning, some seagoing teams record measurements of component air and water weights in a 3-ring binder to refer to when reconfiguring a lander. This helps work through the buoyancy budget, and is also useful for shipping, and shipboard operations planning.
Flotation Materials
While petroleum oils were the primary flotation material in prior years, such as for bathyscaphes, today oils are mainly used for pressure balanced oil-filed (PBOF) applications. Depending on depth, there are several current material choices to consider.
The bulk modulus of the material, its ability to resist change of its volume with pressure, is an important characteristic. We all love the shrunken Styrofoam cups, but that just shows the poor bulk modulus of Styrofoam.
Closed cell rigid polyurethane foams: General Plastics (Tacoma, WA) offers marine grade rigid foams in a range of densities and depth ratings, engineered for shallow to mid-water subsea buoyancy systems. Densities range from 12-lbs/ft3 with test depth of 300-ft (92m), up to 25-lbs/ft3 with a maximum test depth of 1,200-ft (366m). The material has high impact resistance, and is biologically inert. Standard sheet sizes are 10” x 24” x 100”, and 14” x 18” x 100”. The material is easy to machine, coat, and paint, is dimensionally stable, and compatible with many types of adhesives.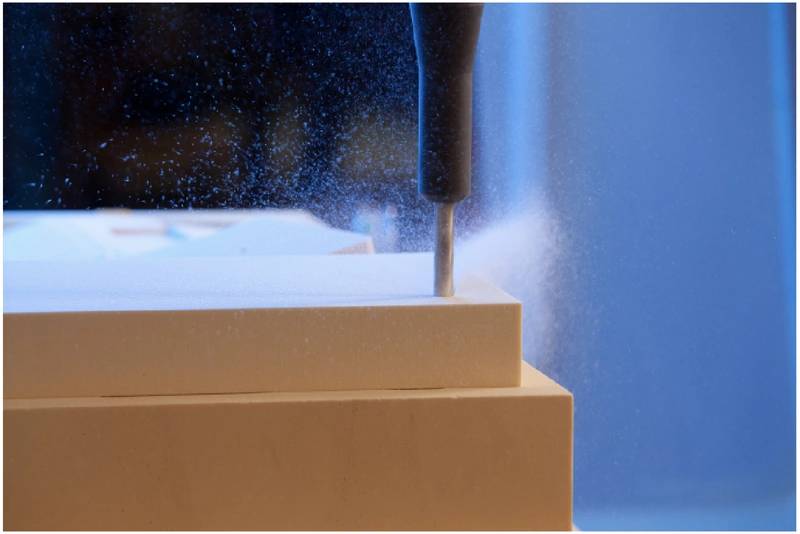 Figure 4. Closed cell rigid polyurethane foam is dimensionally stable and easy to machine, with some densities rated for 1200-ft depth. (Photo courtesy of General Plastics)
The outer edge of the continental shelf is defined as 200 meters (660-ft), so these rigid foams do have a place in nearshore undersea vehicle applications.
Trawl floats: Atlantic Floats (Vordingborg, Denmark) (U.S. distributor: Trawlworks, (Narragansett, RI)) are made in many styles, sizes, and depth ratings. The material is injection molded, thermally fused glass-filled polyamide (nylon). Most are spherical, some are plain spheres, while others have a center pass through (the 8” spheres have a ¾” center hole), while others have “lug” attachments that look like pierced ears. Working depths range from 400-2,000m (1,312 – 6,560-ft), with buoyancy ranging from 1.9-38.7 lb (840gms-17.60 Kgs)
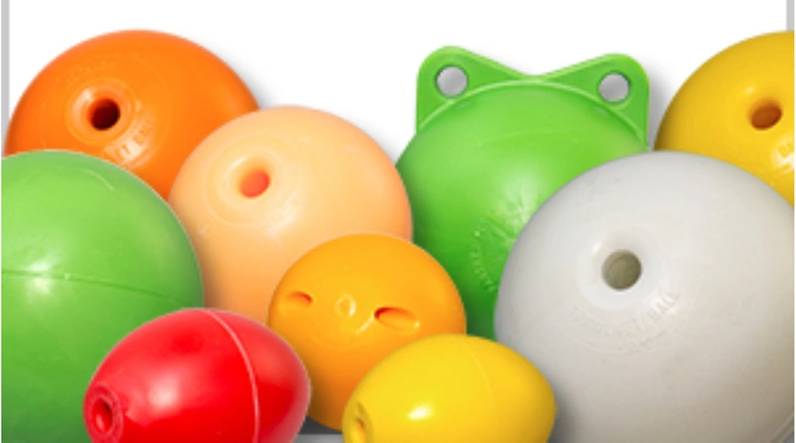 Figure 5. Trawl floats come in a variety of sizes, shapes, colors, and depth ratings. (Photo courtesy of Niels Martin Lundsgaard, Atlantic Floats.)
Global Ocean Design has also made trawl floats into instrument and camera housings.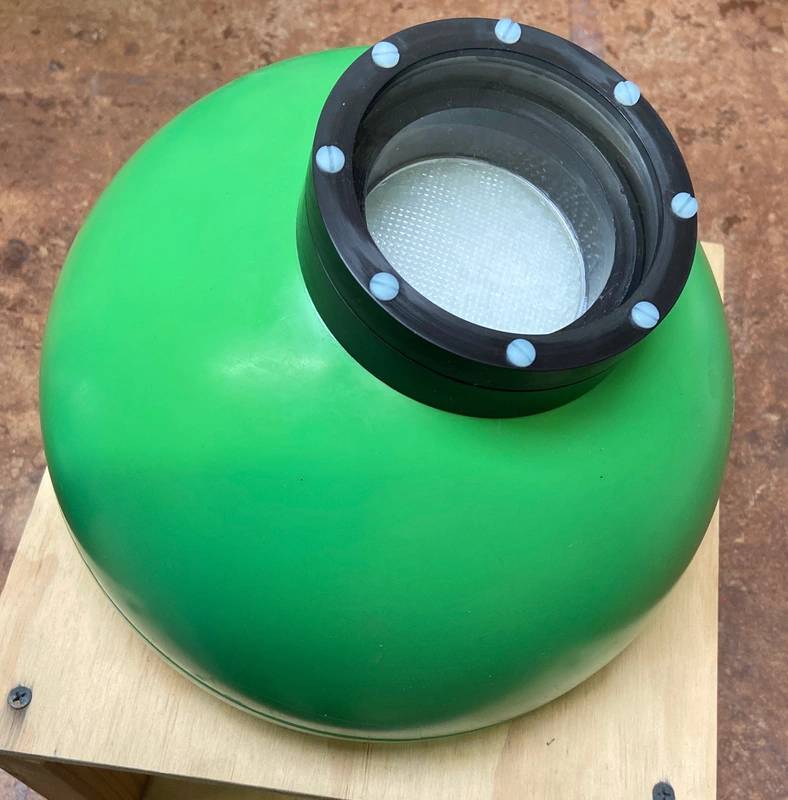 Figure 6. A 10-inch trawl float modified to serve as a camera housing. An o-ring groove makes the seal at the equator of the sphere. Connectors are on the back side. (Photo by Kevin Hardy)Glass: Nautilus Marine Service (Buxtehude, Germany) <https://www.vitrovex.com/>, wide product offerings of size and depth rating to 12km, in borosilicate and BK-5. McLane Labs <mclanelabs.com> (East Falmouth, MA) has inventory of 12” borosilicate spheres for both flotation and instrument housings. Okamoto Glass Co (Kashiwa, Chiba, Japan) https://ogc-jp.com/en/productinfo/glassball/ makes a line of glass spheres (10-inch, 13-inch, 17-inch) with depth ranges of 4-12km. JAMSTEC’s Edokko Mark-1 lander program utilizes their glass.
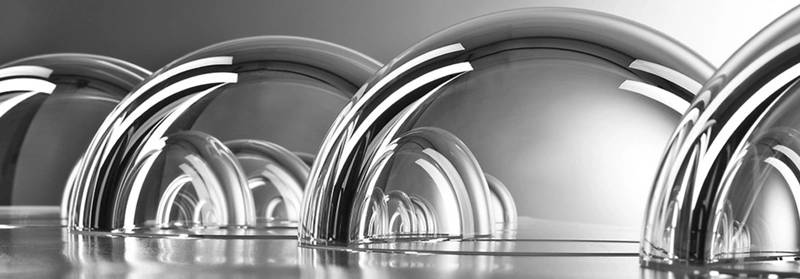 Figure 7. Precision glass spheres by Nautilus Marine Service. (Photo courtesy of Steffen Pausch, Nautilus Marine Service)
Glass provides great compressive strength, is easily formed of readily available materials, can be drilled and even polished to be a camera housing. Bonding to glass with adhesives is easily done. Equipment mounts can be internal or external, providing some design choices. Work is still being done on creating a metal flange to protect the finely polished glass sealing surfaces and provide an o-ring seal. Random surface spalling may be due to residual stresses of the casting and forming operation. Rubber bumpers over the polished glass edge is crutial when the sphere is open to prevent inadvertent damage from impact to the glass.
Syntactic Foam: Engineered Syntactic Systems (Attleboro, MA), Trelleborg/Eccofloat (Boston, MA), DeepWater Buoyancy, (Biddeford, ME) < >, SynFoam (Livingston, NJ).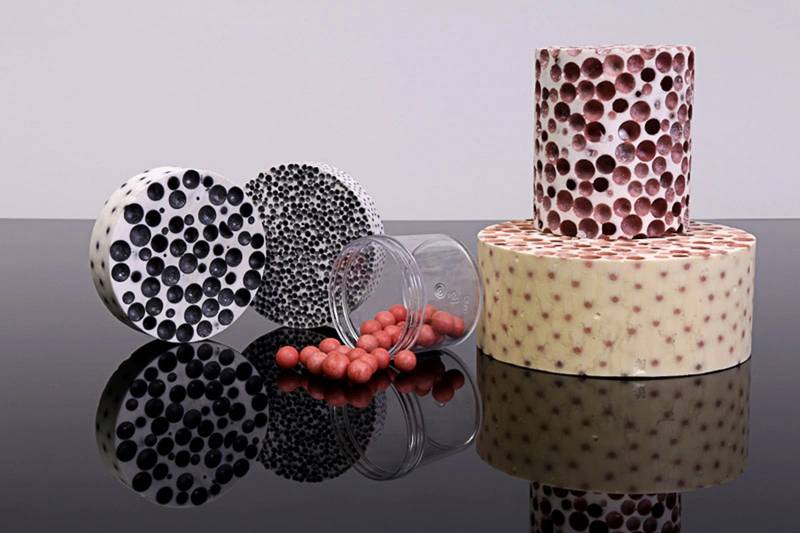 Figure 8. Examples of different compositions of syntactic foam. Larger spheres provide more buoyancy, but have depth limits. The material is formulated for the application. (Photo courtesy of Noel Tessier, Engineered Syntactic Systems)
Syntactic foam embeds hollow glass microspheres in a rigid epoxy matrix. This allows machining to a particular shape. The microspheres have diameters ranging from 10 to 300 micrometers, providing the compressive strength. While the spheres are buoyant, the epoxy is not. A 1mm sphere in a 1mm cube takes up 0.52mm3 volume. The remaining 0.48mm3 interstitial space is filled with epoxy. It has a specific gravity of 1.1. Filled with 30% microspheres, a syntactic block has a specific gravity of 0.85.
Macroballoons can be used to cut the weight, filling the interstitial areas with smaller and smaller microspheres, but at the cost of reduced depth rating.
Syntactic foams can cause excessive wear of machining bits due to the glass microsphere fillers. Dust control is important.
Mixing too large a mass of syntactic is challenging as the resin is exothermic, and can get hot enough to crack the block.
Like thick cake batter, free pouring the thick resin can pull in inclusions of air, which can be a problem at depth. Vacuum degassing is one technique used to control this.
To maximize microspheres in a structure, some companies cast the parts, allowed the microspheres to float to the top, let it cure, then flip the part over and machine off the resin rich layer.
The resin is hygroscopic, and will absorbed moisture over time. That won’t affect the buoyancy of the microspheres. Painting or fiber glassing the exterior of the syntactic part will substantially reduce the potential for water absorption.
You can try your hand at it for not much money. Polymer Composites (Ontario, CA) sells a 1.5-lb/1-gallon kit, with instructions, and training videos.
Rather than locking glass microspheres in hard epoxy, it may be possible to suspended them in oil, filing the interstitial space with a positively buoyant fluid, then use that mixture to fill a soft plastic polyethylene bottle. The hollow microspheres are buoyant, the oil is buoyant (mineral oil has a specific gravity of around 0.88). No chance of inclusions, any captured air will be compressed to nothing. I haven’t tried this yet, but it seems like it will work.
« Le petit baigneur »
A young French student, Jonah Royer, has written me with some ideas he has been thinking about. We are crafting a small lander using a trawl float, a 1-kg counterweight, and a center shaft. A GoPro camera in a housing is the payload. The release is a dissolvable Life Saver, the descent/expendable weight is a cotton sock full of sand. All the parts are there, in all the right order. IFREMER might have an up-and-comer in this young fellow!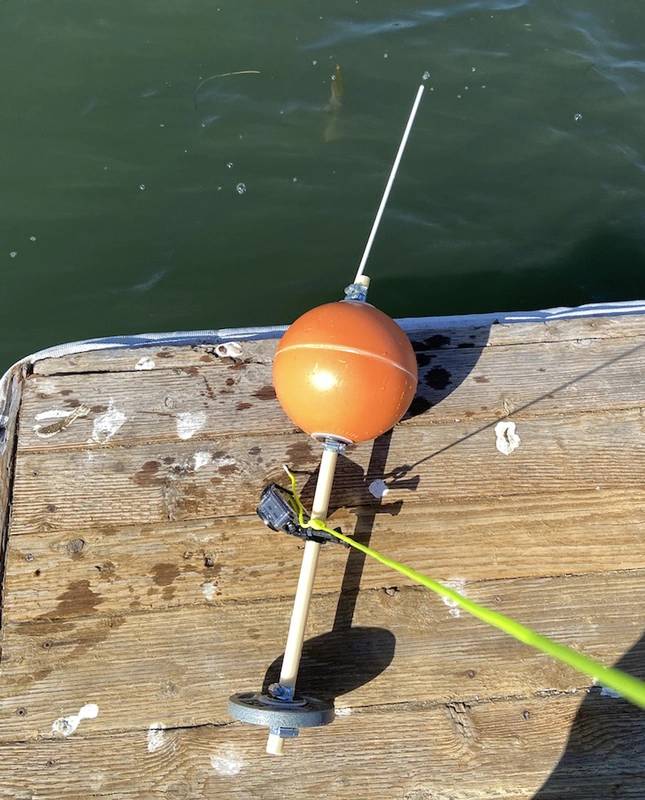 Figure 9. Le petit baigneur, the little bather, a name from a popular 1960’s French film. This little lander is a tool of discovery for a young student in the south of France. The flag mast has since gotten its flag.
Acknowledgements: This column is meant to serve the ocean community in the manner of Make Magazine, Forrest Mims’ Engineer's Mini-Notebooks, or other DIY communities. I hope it will promote creative thinking and curiosity to try new things, as I have benefitted over time from members of the marine community who shared their expertise and enthusiasm with me. From earlier days at Benthos, Sam Raymond and Robert Catalano stand out in my memory. I learned so much working with the TR-6000. Jim Teague, then at Emerson-Cuming/Grace Syntactics, who knows everything there is about syntactic foam, has been a great friend. I have recollection of a paper by Cliff Goudey at MIT/WHOI, who first used plastic trawl floats as shallow water instrument housings. Gerald Albich, then with Nautilus Marine Service in Germany, who was intrigued by an idea to make their Vitrovex glass spheres with a little thicker wall so they would go deeper. The horizon keeps calling us onward.








 December 2025
